Yes, I know the procedure and is very simple.
descrbir Before this procedure, we must become aware that even though the lighting is perfect, the subject is appropriate, the composition is aesthetically correct, the colors are well balanced and the angle of the socket is to be, if the picture is not clear, we are not going to help anything.
The process for improving the sharpness is as follows:
1 .- Open the photo with Adobe Photoshop.
2 .- Go to menu Image => Mode => Lab color

Each pixel is defined by three values, Red, Blue and Green between 0 and 255, to identify its color. There is also a model of enhanced color space called Adobe RGB (ARGB), which comes to play up to 50% of the colors represented in the space L * a * b.
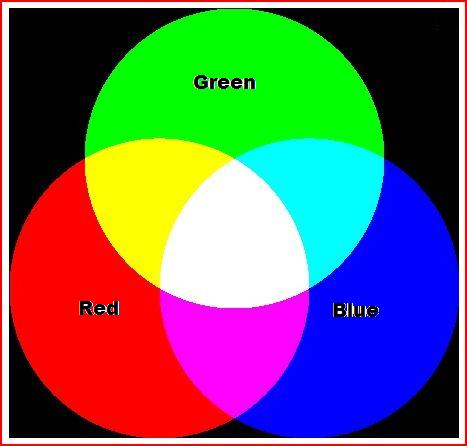
RGB and complementary CMY
In the second case we also have three channels, but the colors are formed in a different way, since one of them (L) defines brightness, from white to black, the channel (a) defines the balance between red and green, and the channel (b) define the balance between blue and yellow. This color space more accurately respond to the number of colors perceived by the human eye.
Each pixel is defined by three values, one that defines the luminosity (L), other value between red and green (a) and the latter a value between blue and yellow (b).

Area CIE L * a * b
3 .- Go to the Channels palette and select channel "L", or Lightness, so we will act only the channel contains details of the image, not the color information.

4 .- Now we go to the Filters menu => = Sharpen> Unsharp Mask ...

5 .- We will present a dialog box where you must do the following:
General purpose: Amount = 85%, Radius = 1, Threshold = 4
For individuals: Amount = 150%, Radius = 1, Threshold = 10
For urban and landscape photography: Amount = 65%, Radius = 3, Threshold = 4
This data according to Master Scott Kelby

Yes, I know it says Radius = 1.1, but should read Radius = 1
6 .- Finally, we return our photo to your original color space, RGB and save. Presto, now our picture is sharper and sharper, which was our objective.

hope this procedure will serve. Until next post!
0 comments:
Post a Comment